

Test and live
Every workspace has two environments, test and live. Each has its own API keys, webhook endpoints, limits, counts, balances, reservations and usage. Build and try your limits in test, then copy them to live when they work. Your production code uses a live key.
| Test | Live | |
|---|---|---|
| API keys | start with lim_test_ |
start with lim_live_ |
| Checks | count against a test allowance, not billed | count toward your plan |
| Plan limit | a hard stop at the test allowance | 10% grace, then your fail mode |
| Workspace API | a test key can read, not change | a live key can read and change |
| Webhooks | to test endpoints only | to live endpoints only |
You can’t rename the two environments, remove one or add a third.
The key decides
Section titled “The key decides”A key belongs to one environment, and its prefix says which:
lim_test_… or lim_live_…. A request made with a test key reads and
changes only test limits and counts. A request made with a live key
uses only live ones. The API paths are the same in both, so moving to
production means changing the key and nothing else.
Limit names are unique within an environment, so test and live can each have an “AI budget” limit. A limit id from one environment is not found with the other environment’s key. The same goes for a reservation: settle it with a key from the environment that made it.
Test traffic can’t move live counts, even by mistake. A check made with a test key never counts toward a live limit, a live balance or your plan’s allowed checks and active subjects.
In the app
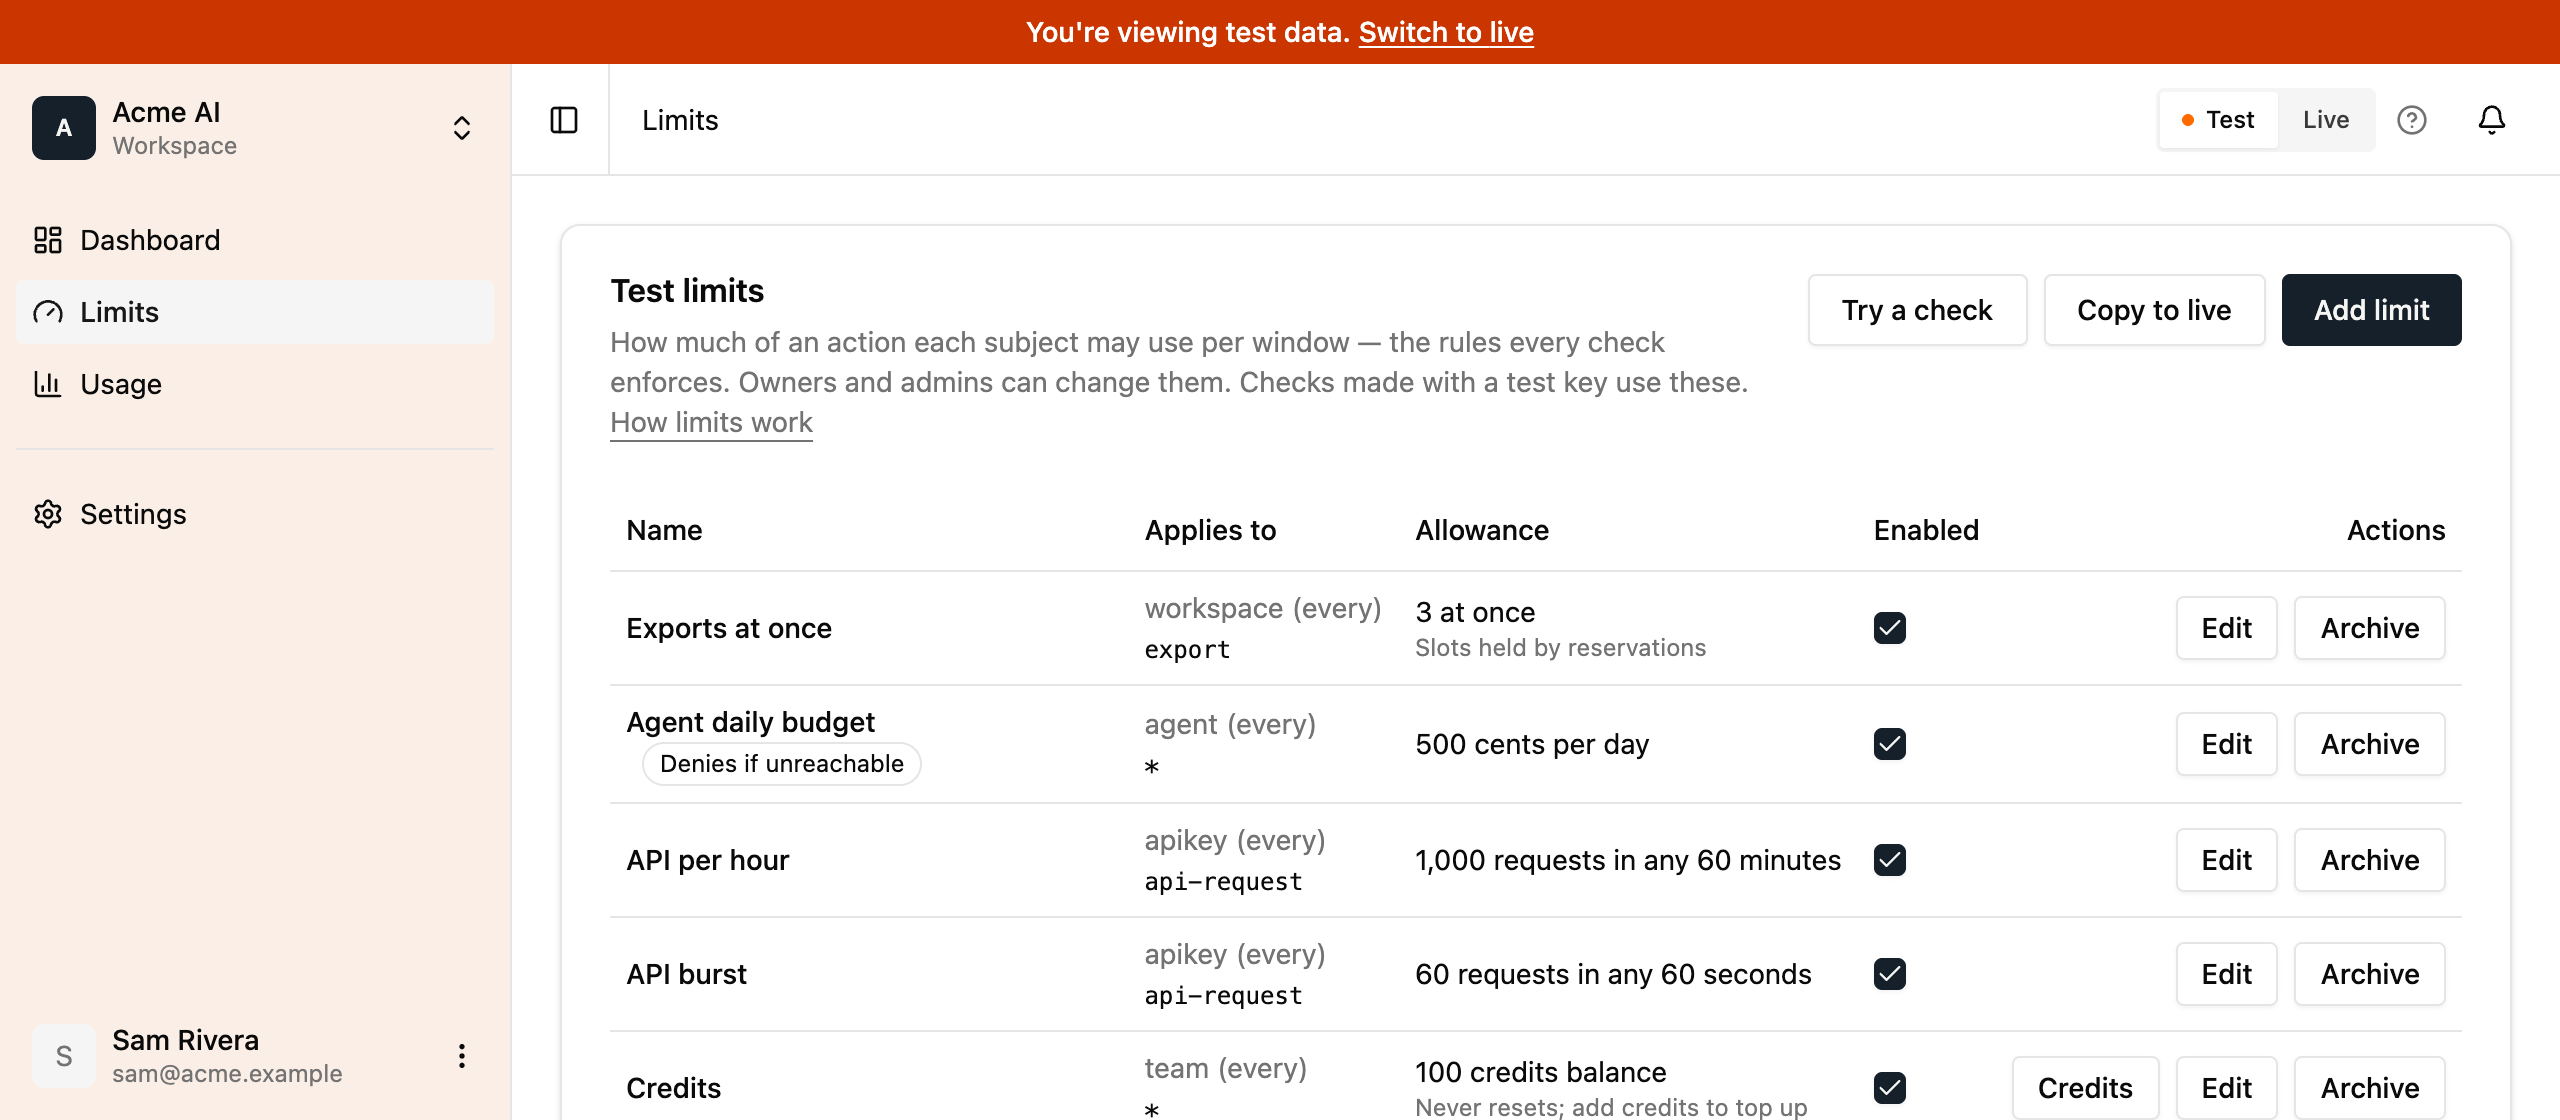
Section titled “In the app”Switch between test and live with the Test | Live toggle at the top right of the app. The side you’re on is highlighted with a dot. Limits, usage, credits, API keys and webhooks all show that side, and each page’s title says which, such as “Test API keys”. While you’re in test, an orange bar across the top of the page says “You’re viewing test data”, with a link to switch to live. The app remembers your choice for each workspace in this browser, and starts in test.
Workspace-wide settings, such as members, billing and the audit log, are the same in both. Switching doesn’t change them. Webhook endpoints aren’t shared: each endpoint belongs to one side and receives only that side’s events.
The test allowance
Section titled “The test allowance”Test checks have their own monthly allowance, 10% of your plan’s
allowed checks, and they aren’t billed. Test checks never count toward
your allowed checks or active subjects. The test allowance has no
grace: once a workspace uses it up, test checks answer
402 plan_limit_reached until the month resets or you upgrade. Live
checks carry on as normal. See Plan allowances for the
numbers on each plan.
Copy to live
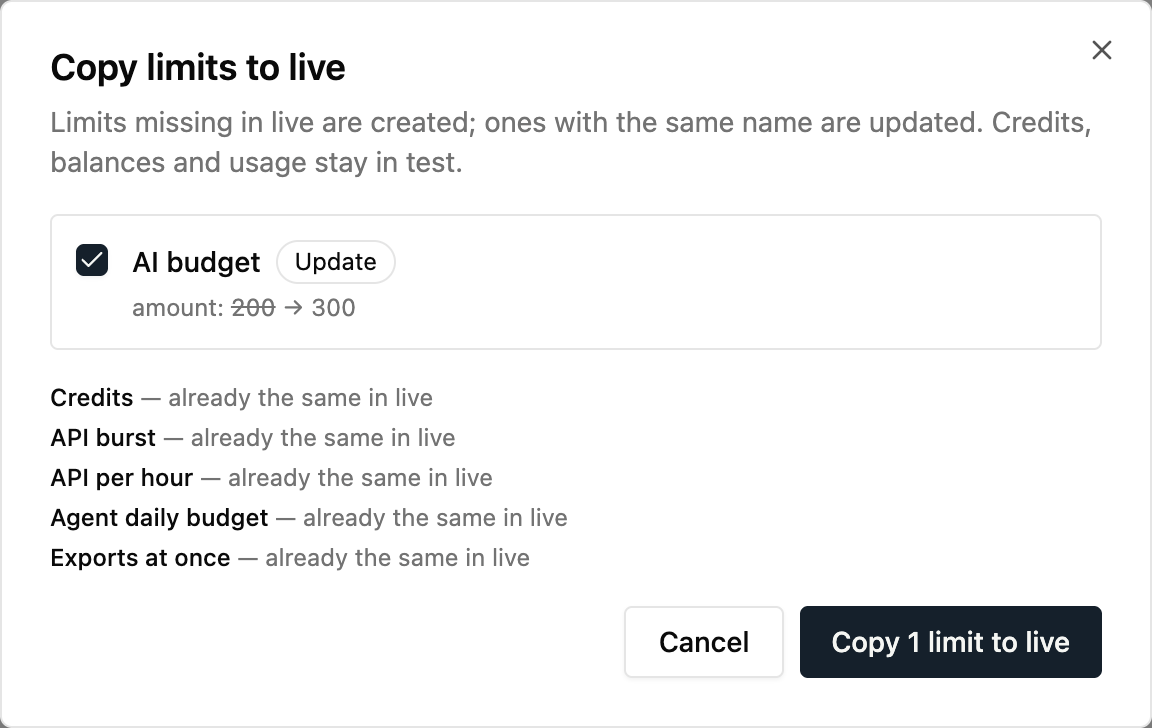
Section titled “Copy to live”Once your limits work in test, copy them to live instead of creating them again. On the Limits page, switch to test and click Copy to live. Limitry lists exactly what will change in live before anything happens:
- When live has no limit with a test limit’s name, Limitry creates it in live.
- When live has a limit with the same name, Limitry updates it to match, field by field. The dialog shows each change, such as an amount going from 200 to 300.
- A limit that already matches is left alone.
- A limit can’t change to or from
concurrentin place. Archive or rename the live one first.
The dialog ticks every limit it would change. Untick any you don’t want to copy, then
confirm. Copy to live carries over the subject, action, amount, unit,
window, every, start, rolling, enabled and fail mode settings. It never copies credits
you added, balances, reservations or usage: live keeps its own.
Owners and admins can copy limits. The audit log records each copy as
limits.copied_to_live, with the limits it created and updated. An AI
agent can’t copy limits itself; it asks, and an owner or admin approves
(see Approvals).
There’s no API call for Copy to live, because every key belongs to one environment. To do the same from your own code, read the limits with a test key and create or update them with a live key.
Your tools default to test
Section titled “Your tools default to test”Your own tools act as you: the CLI, the MCP server, and scripts with a personal access token. They work in test unless you name live, so a mistake changes test limits, never the ones your customers depend on. To act in live, say so:
| Tool | Live |
|---|---|
| CLI | --environment live, LIMITRY_ENVIRONMENT=live, or limitry environment use live |
| MCP server | connect to https://mcp.limitry.com/mcp?environment=live |
| SDK | createClient({ token, environment: "live" }) |
| HTTP, with a token | the header X-Environment: live |
Every answer names its environment. The CLI prints
Environment: test or Environment: live after each command, and
every MCP tool result ends with the same line. An HTTP response to a
personal access token or an agent carries an X-Environment header.
An API key always acts in its own environment, so it needs none of
this. If a request made with a key names any other environment, it gets
403 forbidden. A token that names an environment that doesn’t exist
gets 400 invalid_request.
What a test key can’t change
Section titled “What a test key can’t change”A test key can read workspace-wide things: members, webhook endpoints,
deliveries, the audit log, approvals and workspace usage. It can’t
change them: test keys are for trying limits, not for setting up the
workspace. A test key that tries gets 403 forbidden with
the message “A test key cannot change workspace-wide settings”. Use a
live key or a personal access token to manage webhook endpoints through
the API.
Webhooks
Section titled “Webhooks”Each webhook endpoint belongs to test or live, like an API key, and gets only that environment’s events. Add an endpoint under Settings → Webhooks with the environment it’s for selected: a test endpoint for your staging app and a live one for production. Events about the workspace itself, such as a member joining, go to endpoints in both.
Every Limitry event also says where it happened in its environment
field, "test" or "live":
{ "type": "limit.exceeded", "data": { "limit": "lim_…", "name": "AI budget", "action": "ai-call", "unit": "cents", "window": "month", "subject": { "kind": "user", "id": "usr_123" }, "environment": "test", "windowStart": "2026-10-01T00:00:00.000Z", "resetsAt": "2026-11-01T00:00:00.000Z" }}We moved endpoints added before 10 October 2026 to live.
Older keys
Section titled “Older keys”Keys that start with sk_limitry_ date from before test and live
existed. They no longer work and get 401 unauthorized. Create a test
or live key under Settings → API Keys instead.